Difference between revisions of "Kraken Rebuild Details"
| Line 1: | Line 1: | ||
This page details the zero dollar rebuild of [[The Kraken]] to convert it into a Prusa i3 2020 aluminum frame reworking. | This page details the zero dollar rebuild of [[The Kraken]] to convert it into a Prusa i3 2020 aluminum frame reworking. | ||
| Line 19: | Line 17: | ||
The original frame was printed in PLA, which is not ideal for structural uses. We bought ABS to print parts for the Prusa i3 to keep with the color scheme of the original machine. | The original frame was printed in PLA, which is not ideal for structural uses. We bought ABS to print parts for the Prusa i3 to keep with the color scheme of the original machine. | ||
* Assorted M3 and M5 bolts, washers, T-nuts, etc. | * Assorted M3 and M5 bolts, washers, T-nuts, etc. | ||
| Line 57: | Line 43: | ||
A few new parts have been printed. The Budaschnozzle did not fit the standard extruder so a new one was made. The frame was also disassembled so that steel corner brackets could be installed to greatly increase the rigidity of the frame. The wiring was wrapped in new cable management wrap and most of the electronics were ran to the board. A new aluminum Y carriage was ordered to replace the original acrylic bed. | A few new parts have been printed. The Budaschnozzle did not fit the standard extruder so a new one was made. The frame was also disassembled so that steel corner brackets could be installed to greatly increase the rigidity of the frame. The wiring was wrapped in new cable management wrap and most of the electronics were ran to the board. A new aluminum Y carriage was ordered to replace the original acrylic bed. | ||
== Gallery == | == Gallery == | ||
| Line 91: | Line 57: | ||
File:2016-01-03_23.47.14.jpg|Frame bracket close ups | File:2016-01-03_23.47.14.jpg|Frame bracket close ups | ||
File:2016-01-03_02.47.44.jpg|Wiring and cable management | File:2016-01-03_02.47.44.jpg|Wiring and cable management | ||
</gallery> | </gallery> | ||
Revision as of 13:04, 4 January 2016
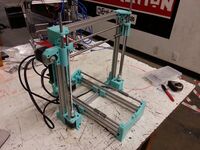
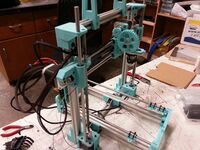
This page details the zero dollar rebuild of The Kraken to convert it into a Prusa i3 2020 aluminum frame reworking.
The original build of The Kraken suffered from design problems that caused the entire frame to torque and move out of square, which severely limited the printing speed and quality. The Prusa i3 is a well tested design and could be built using parts salvaged from the original Kraken.
Prusa i3 "Wilson"
Because the original Kraken was built using 2020 aluminum extrusion, the new machine would be built into a slight reworking of the "Wilson" 2020 Prusa i3 design. The Kraken's threaded rod are 8mm whereas the Wilson uses 5mm, so parts were slightly modified to accommodate the larger rod and nuts.
Purchased Materials
- Budaschnozzle 2.0c (replacement for original J-head hot end)
This was purchased before the rebuild, as the old hot end suffered from several failures. The new hot end also allows us to print in other materials besides PLA.
The original frame was printed in PLA, which is not ideal for structural uses. We bought ABS to print parts for the Prusa i3 to keep with the color scheme of the original machine.
- Assorted M3 and M5 bolts, washers, T-nuts, etc.
Vitamins were bought to supplement the ones removed from the original machine, in case more were needed during the rebuild.
Build Log
NOV-28
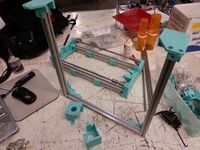
The original Kraken was disassembled to bare components. The 2020 sections were cut to length for the Wilson. ABS was purchased to print the frame components. The Z-axis parts were modified to accommodate the larger threaded rod and nuts.
NOV-30
The Budaschnozzle hot end was disassembled and cleaned of old filaments. ABS for the frame was delivered. Vitamins were collected and sorted to speed up the assembly later in the build.
DEC-5
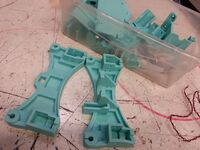
Parts for the new chassis beginning to be printed.
DEC-12
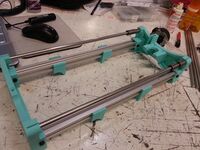
Printed parts finished. The majority of the frame was rebuilt, but a few 3D printed parts need to be remade and a few odd vitamins need to be sourced.
JAN-3
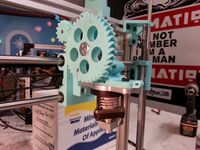
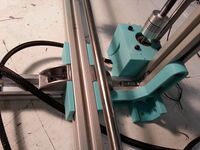
A few new parts have been printed. The Budaschnozzle did not fit the standard extruder so a new one was made. The frame was also disassembled so that steel corner brackets could be installed to greatly increase the rigidity of the frame. The wiring was wrapped in new cable management wrap and most of the electronics were ran to the board. A new aluminum Y carriage was ordered to replace the original acrylic bed.
Gallery
- 2013-08-17 19.15.54.jpg
The original build of The Kraken
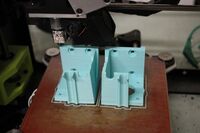
Printing parts for the rebuild on the Lulzbot Mini
