Laser Cutter
Zone
16: CNC Lab
Owner(s)
- Freeside
Permissions
For general use by members after they have completed an appropriate training course. Treat this equipment as if it were your own cleaning items off of the top of the machine and around its table after usage.
Usage Fee
The laser is a delicate machine with several consumable parts. In order to maintain the laser, Freeside asks for a $5/hour usage fee from members using the laser. These funds will be used to repair the laser, replace tubes, lenses, or other items that wear out, and when there is a surplus, make upgrades.
Laser usage fees should be paid to the Treasurer via payments@freesideatlanta.org with any of methods of payment accepted for dues. Please indicate that the payment is for laser usage for proper accounting.
Restrictions
The laser cutter is a CNC (Computer Numeric Control) machine capable of the following (See the Laser Library for more details):
- Cutting
   * paper
   * cardboard
   * plastics up to 1/2" depending on type
   * craft foam
   * plywood of certain thicknesses depending on number of layers as well as what type of bonding glue was used
   * other stuff I haven't yet tried
- Engraving (raster and vector)
   * cardboard
   * plastic
   * wood
   * glass
   * dark stone
   * ceramic
   * leather
Caution
Contrary to popular belief lasers don't melt things. They remove material via a process called sublimation, turning an object from the solid state directly to the gaseous state, skipping the liquid stage almost completely.
The laser uses an RF-excited CO2 gas laser producing a beam invisible to the human eye, with a wavelength of 1090um. Almost everything is opaque to this wavelength and as such if the laser can sublimate the material it will. This means that if you put *anything* in the path of the laser, the laser will try to cut it. If the laser can't cut the material and the material doesn't reflect the beam, the material *WILL* heat up very rapidly. The excited gas you can see in the tube is similar to what can be seen in neon signs. 25KV is applied, and the gas is excited to the point where it has to release extra electrons and you see this as light. Do not forget that the beam coming out of the tube is completely invisible and completely dangerous.
Do not, under any circumstance, power the laser cutter on unless:
- the E-stop on the machine is on
- the machine controller is attached
- the operating system is completely booted
- Mach3 is running and in the foreground
- the E-stop in Mach3 is engaged
Do not apply the laser to any material containing chlorine. Chlorine is poisonous, and also will damage the electronic components of the laser cutter.
Specifications
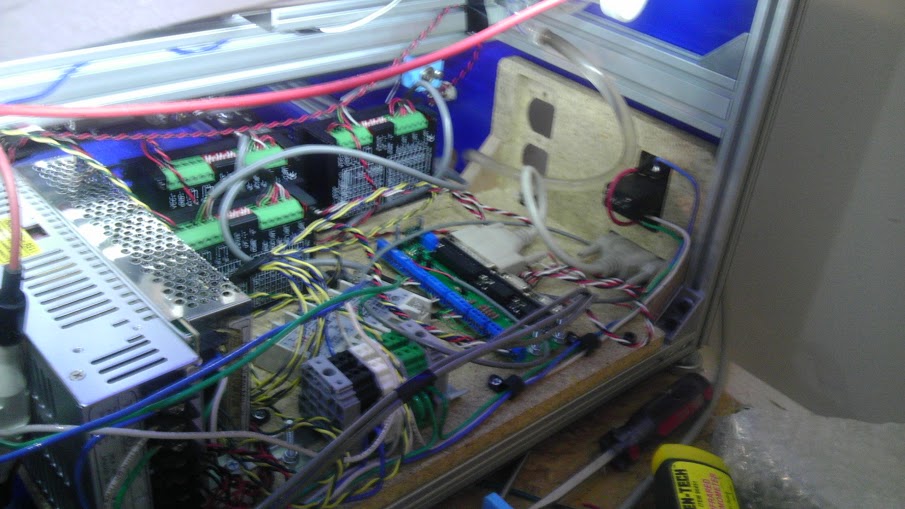
In this picture from left to right you can see:
- 24VDC power supply; large aluminum case
- 12VDC power supply; small aluminum case
- In the back are 3 Keling stepper drivers; black aluminum cases with green wiring terminals
- In front of those are 2 120VAC solid state relays (not wired and currently not present in the enclosure); grey plastic cases
- Breakout board
- Power entry
- Hole for 120VAC duplex outlet
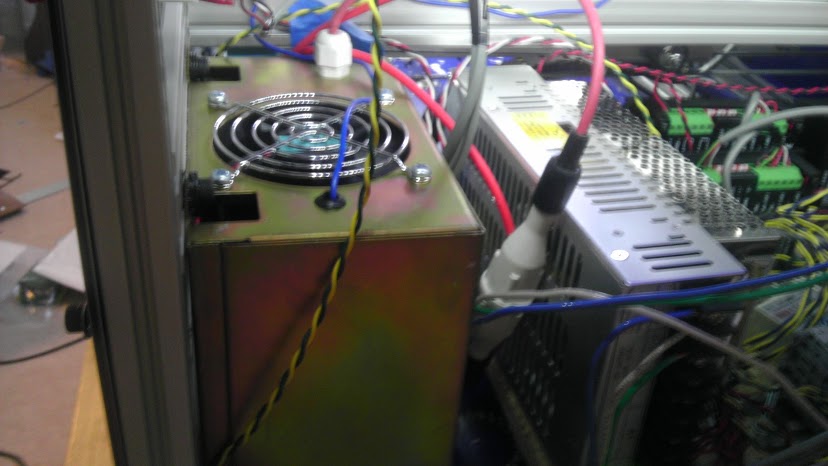
In the second picture you can see the high voltage power supply

The gantry is driven by a single dual-shaft stepper motor. This motor has a driveshaft on either side that goes to a bearing mechanism attached to the Y rails. Nearest this bearing mechanism there is a timing belt pulley on the shaft. The belt rides on this pulley and connects to the gantry's carriage to pull it back and forth. All motion in the laser cutter is established via pulling as you can't push a belt.
The lens carriage is driven by a stepper motor with a timing belt attached to the carriage.
The wiring exists for a Z(table) stepper but it's not currently installed. The large timing gear can be turned by hand to adjust the table up/down.
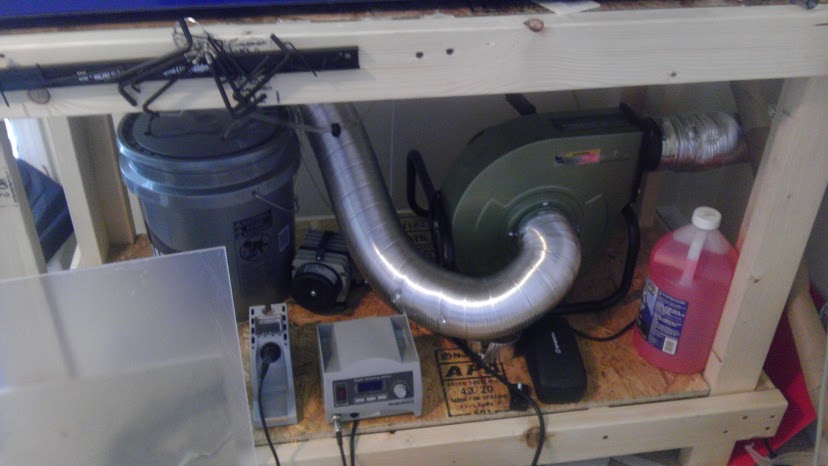
The laser cutter is supported by several pieces of equipment outside of its own enclosure: From left to right
- The coolant tank stores an amount of water/antifreeze mixture as well as houses the 24V bilge pump to circulate the coolant. Because of the amount of coolant available the temperature increase is not noticeable.
- The air assist pump pumps air into the nozzle attached to the focusing lens on the laser carriage. It's purpose is twofold: keep smoke/debris from out of the line of the laser's beam and off of the optics themselves, and assist the sublimation process by expelling the gasses created
- The fume extractor draws air in from the front of the laser cutter enclosure, across the cutting surface, and out through the back of the enclosure. (Actual equipment subject to change)
The laser beam itself is guided to the cutting nozzle using a "flying optic" system. This means that the laser tube stays in one place and the beam is directed around the enclosure using mirrors. The beam exits the laser tube and hits the first mirror at a ~45 degree angle. It then is reflected onto the gantry's mirror again hitting at ~45 degree angle. It is then reflected onto the carriage mirror at ~45 degree angle and then hits the focusing lens.
Dimensions
The dimensions of the work area are:
X: 453mm
Y: 289mm
Depending on the Z-axis setting, the Z-axis knob might interfere with the carriage. In this case, the rear, left corner of the work area is reduced by a rectangle 13mm in the Y dimension, and 113mm in the X dimension.
The frontmost, leftmost point in the work area is located 140mm from the left wall of the laser cutter cabinet, and 79mm from the front wall.
The grill on which work is set is 605mm wide, 304mm front-to-back, and 23mm thick.
If possible, I will link to templates for the work area in PNG, DXF, and SVG format.
Tips
- Test power level and feedrate on a piece of material like the one you intend to use.
- More isn't always better in regard to power.
- More isn't always better in regard to assist air.
- When watching the laser cut/engrave wood, wear sunglasses, cutting goggles, or a welding helmet. The light coming off of the material is extremely bright.
- Never look directly at the item being cut without at least one material between you and the beam ie: no peeking in the vent holes without protective glasses
- From time to time the gantry gets out of square due to slop in the belts and loosening screws. In order to fix this you need to:
- Loosen one of the setscrews on one of the Y drive pulleys.
- Pull the gantry to the front of the enclosure and using a square like one of these: http://www.harborfreight.com/3-piece-l-square-set-with-levels-98556.html with the large part against the front frame and the blade extending toward the gantry, make sure both sides are equidistant.
- If the belts are loose on one or both sides you can adjust tension using the front idler pulley brackets.
- Loosen the screws and pull the bracket forward.
- Hold the bracket still and re-tighten the screws.
- After the gantry is square and the belts are tight, re-tighten the set screw on the Y drive pulley you loosened earlier.
Quick Reference
- The focusing lens has a 65mm focal point.
- For cutting, the bottom of the carriage should be ~81mm from the surface of the material you intend to cut.


